Installing the Sleep sensor
Step 1 – Getting ready
Your reseaerch team will provide you with:
- Sleep Analyzer with power supply
- Data hub with power supply (optional – if you don’t have WiFi)
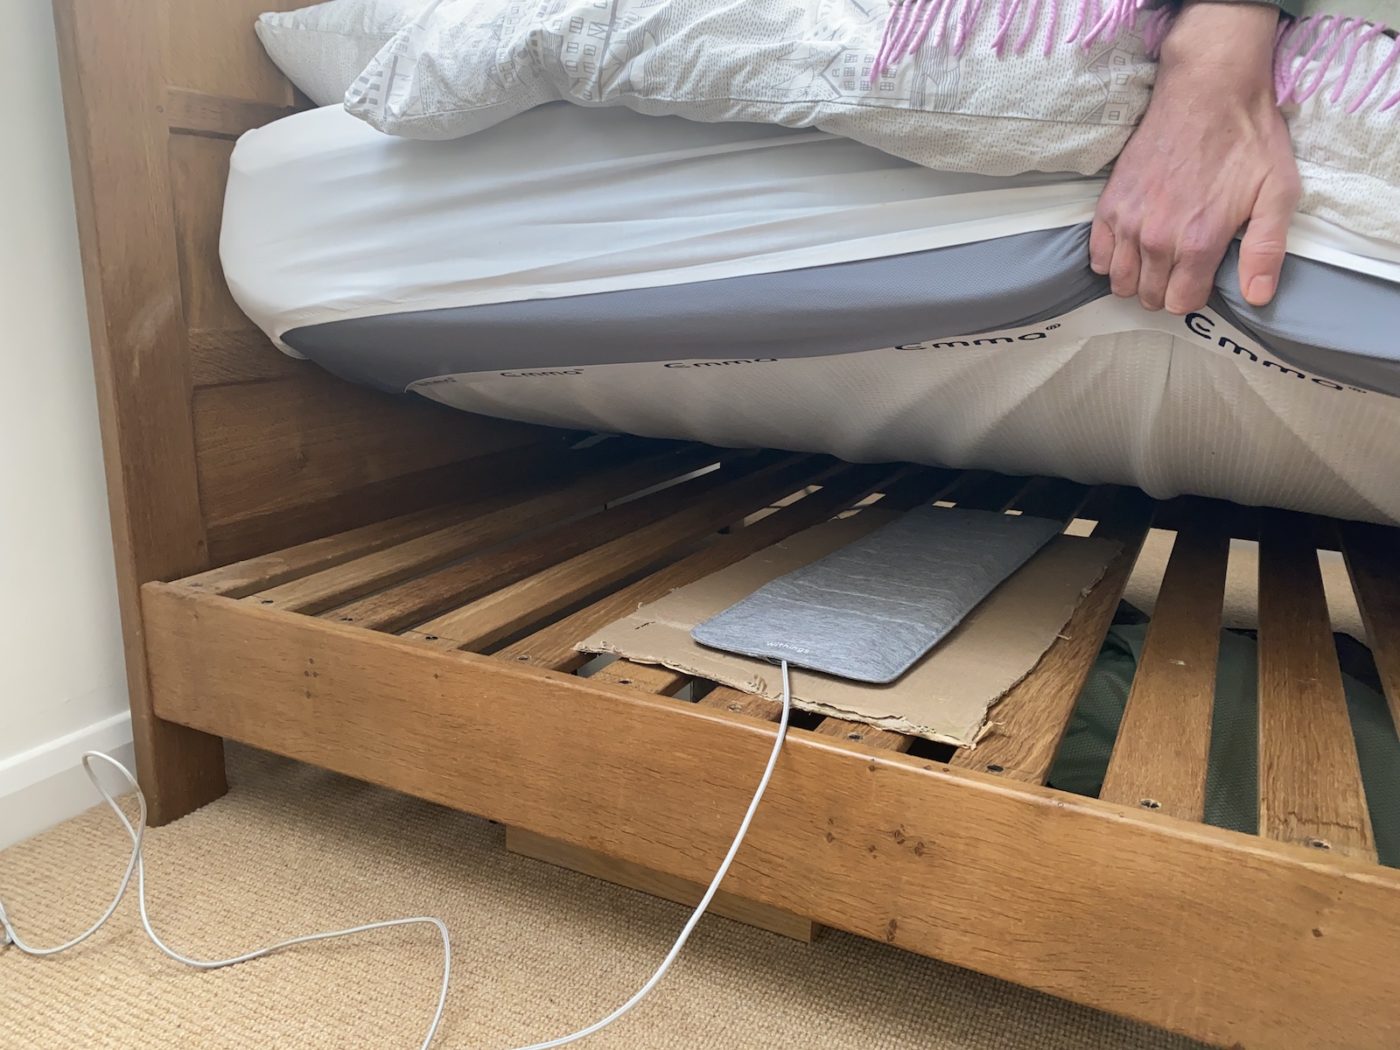
If you have a slatted bed you will also need a bit of cardboard (e.g. an unfolded Amazon delivery box) to place under the sleep sensor (see photo below). Cardboard should be 30cm by 60 cm or bigger.
Step 2 – Place the data hub
- The data hub needs to be plugged in and remain powered on for the duration of the study. Please choose a wall socket where it can be left plugged in. The data hub should be within 15 feet (5 metres) from the bed. A socket near a window may improve connection to the cellular data network.
- When plugged in, the LED on the unit will blink blue, and will turn green to show a successful network connection within 10 mins. If the light turns green should you proceed to step 3, and will not need step 4.
- If the light on the hub does not turn green within 10 minutes, see if you can find a location with better reception, near a window perhaps, but still within 5 metres of the bed. This could be in a neighbouring room. Once again, give the data hub 10 minutes to make a connection.
- If the light still does not turn green:
- If you have wifi in the house, we can use your wifi network to send sleet mat data instead of the data hub. Please proceed to step 3, and then complete step 4.
- If you do not have Wi-Fi in the house, please contact the Insight 46 team for advice.
Caution: The mattress will need to be lifted to place your sleep sensor correctly. Mattresses can be very heavy, we recommend that you get help to do this, to avoid risk of injury.
Step 3 – Placing the Sleep Sensor
Placing the sleep sensor on a slatted bed
- The sleep sensor monitors only a single user, even in a double bed with two occupants. It should be placed under the usual sleeping position of the research participant. If you sleep alone in a double bed, we recommend that you place the sleep sensor in the middle of the bed.
- The sleep sensor goes underneath the mattress, with the power cable sticking out to the side of the bed.
- The long side of the sensor goes across the bed, so that it spans the width of a single sleeping position.
- The sleep sensor should be placed under that mattress, in a position directly beneath the chest of the user.
- If you have a slatted frame, please place a piece of cardboard between the sensor and the slats for better support.
- Once installed in the correct position, the sleep sensor can be plugged into a mains electricity socket.
- If you are using the data hub (with green light), the mat will automatically start to calibrate.
- If you are not using the hub, the mat will not calibrate until you complete step 4.
- Do not occupy the bed for at least 10 minutes, while the sleep sensor calibrates.
The Sleep Sensor should be positioned across the bed, under the mattress and directly beneath the chest of the sleeping person.
If you have a slatted bed, please place some cardboard under the sensor to provide better support.
Step 4 – Using Wi-Fi instead of the data hub (only if necessary)
If there is no cellular coverage for the sleep sensor, then we ask you to use an app to connect the Sleep Analyzer to your WiFi.
You will need to download the free Withings Connect Assistant app, which you can get from the Google Play Store or Apple’s App Store. (or search for “Withings Connect Assistant” in the Playstore / App Store)
The app is published by Withings specifically for this purpose, please note:
- The app is free and available on the Apple AppStore or Google Play Store
- You will need a smartphone or tablet device
- There will be no need to set up a Withings account
- Once connected, you are free to delete the app from your device if you wish.
Please follow these steps:
- Start by making sure your phone / tablet is connected to your home’s Wi-Fi network.
- When you have found the app in the app store (see above), download it to your phone.
- Tap on the App to open it.
- If asked “am I part of a remote program?” – select yes.
- Now chose “set up with your phone” from the menu
- Follow the onscreen instructions to connect your device to your Wi-Fi. You will know you have been successful when you hear the Sleep sensor inflating slightly with a buzzing noise for a few seconds.
Step 5 – Let us know when you are set up
After your first night using the Sleep Analyzer, please contact your research team to let them know that the device is installed, so that they can check that the data is coming through and initiate the monitoring period on our system.